WooCommerce App Setup
WordPress
1. Install Jetpack
a. Go to plugins on the WordPress panel
b. Click on add new
c. Search for jetpack
d. Click on install
e. After the install click on activate
2. Set up Jetpack
a. Click on Set Up Jetpack
b. If the information being displayed is correct, click on approve. If it is not correct, click on "sign in as a different user"
c. When signing in as a different user create your WordPress account
App
1. Install
a. Go to the preferred play store
b. Search for "WooCommerce"
c. Click on install
d. After the install is finished, click on "open" to open the app
2. Log In
a. Once the app is open, click on "enter store address"
b. Enter the URL of the website where your store is on, and press "Continue".
c. Then enter the email address that is linked to the website URL as well as Jetpack and WordPress, and press "Continue".
d. You will then have to enter the password you have created with your WordPress account, and press "Continue".
YOU WILL THEN BE SIGNED IN AND BE ABLE TO SEE YOUR STORES DASHBOARD.
You can manage your orders from the "Orders" tab on the bottom navigation panel
Add Products
1. Simple Products
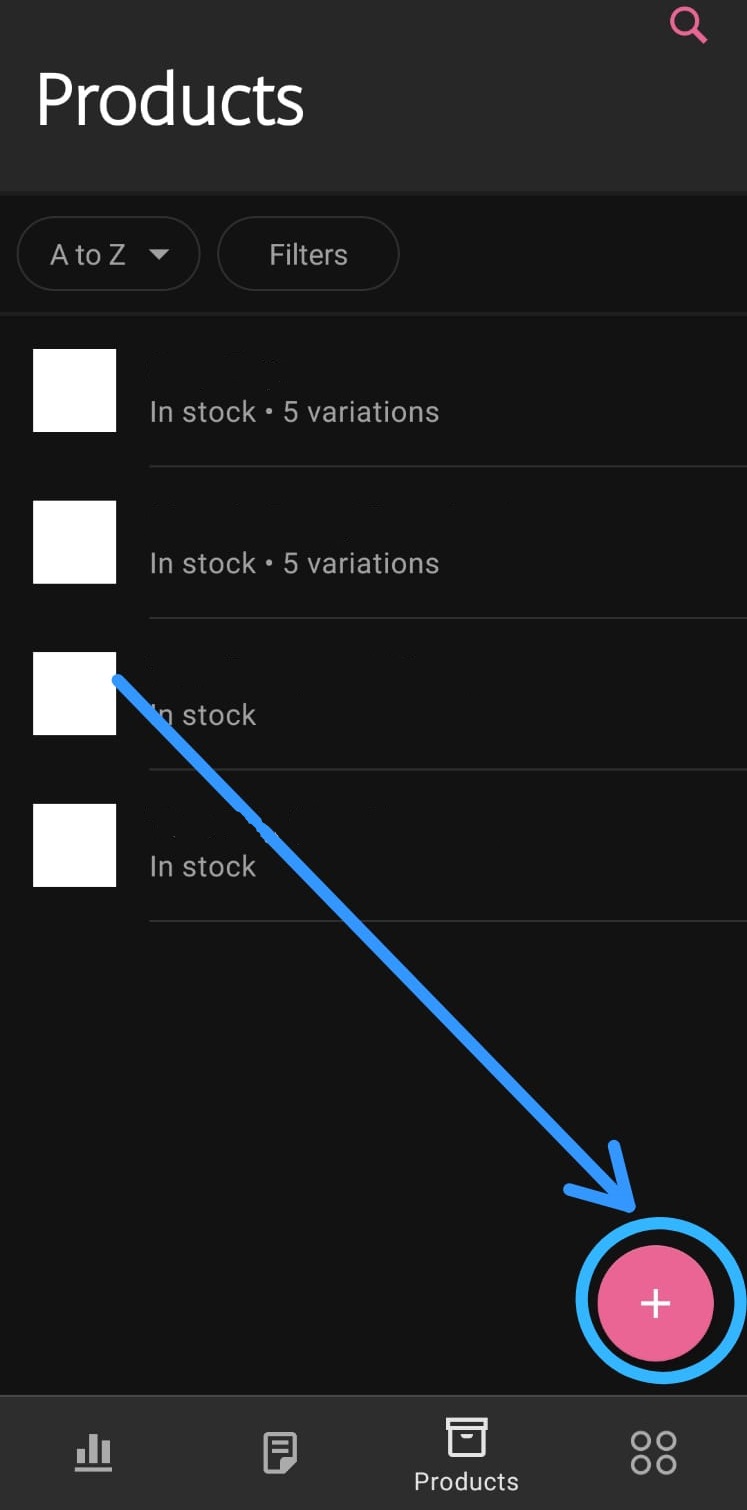
a. Go to the products tab (the third option on the bottom navigation panel)
b. Click on the + icon to add a new product
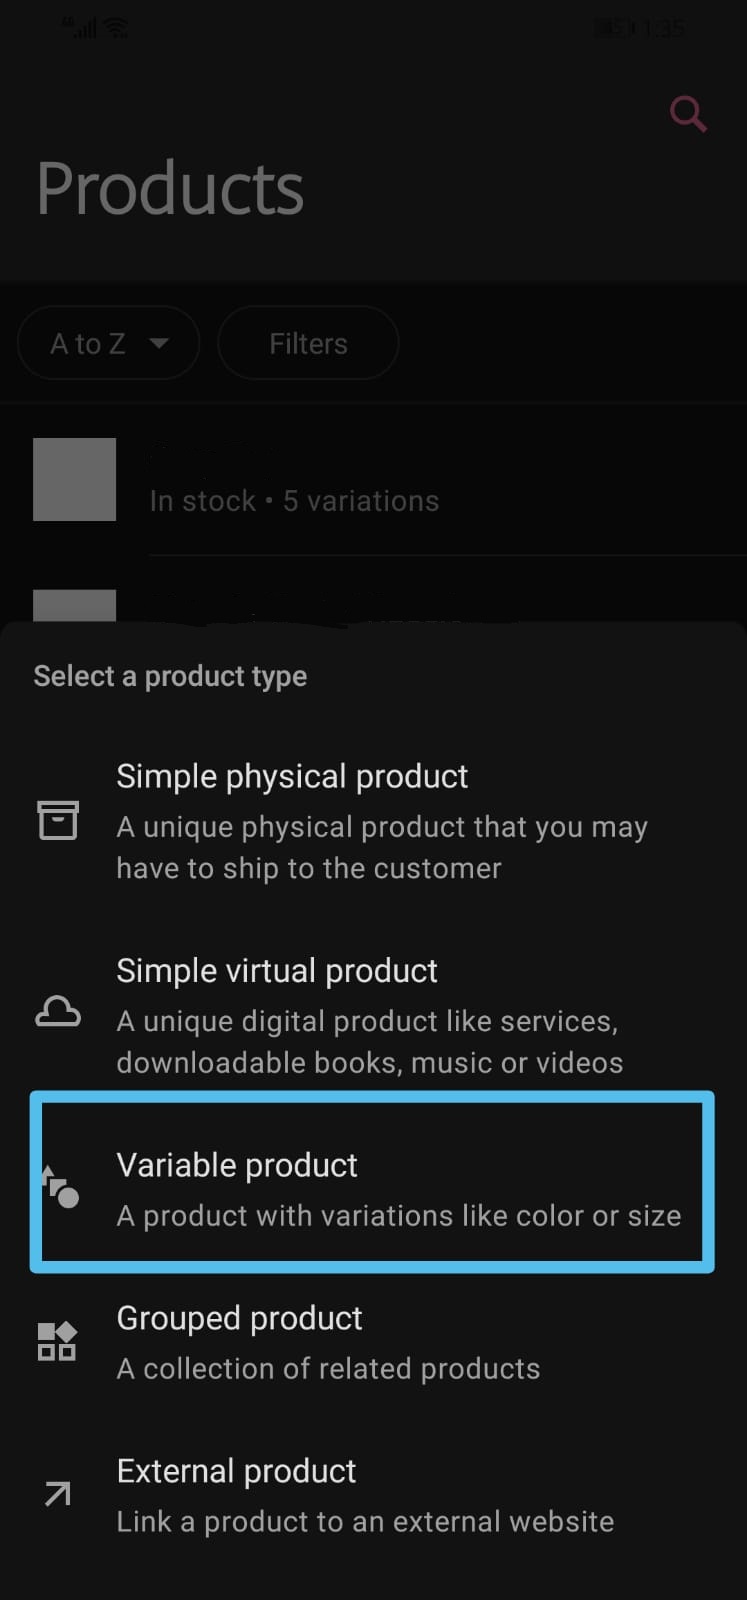
c. Choose "Simple Physical Product"
d. Enter the information required/needed
i. Product Images
ii. Product Name
iii. Product Description
iv. Product Price
v. Publish the product.
2. Variable Products
a. Go to the products tab (the third option on the bottom navigation panel)
b. Click on the + icon to add a new product

c. Choose "Variable Product"
d. Enter the information required/needed
i. Product Images
ii. Product Name
iii. Product Description e. Click on "Add variables"
f. Enter the first attribute of the product (e.g. Size)
In order to save the attribute, press the enter key on your keyboard
g. Enter the different options that fall under the saved attribute (e.g. Small to Large)
To add multiple options under one
attribute, press enter and type in the next option, until all options for the
attribute have been entered.
h. Then press "NEXT"
i. Either add more attributes or choose next.
If you have multiple attributes
(e.g. size and color) add the rest of the attributes by clicking “add
attribute” and following steps f to h again until you have all of your
attributes. Once done, click next again.
j. Then click on "generate variation"
k. Click on the variation you would like to edit first (e.g. Size)
l. Click on "add price", this will add a single price for all options under one attribute/variation.
m. Add a flatrate price for all variations
n. Publish when done.